Track website analytics
Goal: see who visits your website, where they come from and what they do. Time: about 5 minutes. You need: access to your site's shared footer or layout template.
The tracker is one script tag. You add it once, in the template every page already shares (your footer, base layout or root component). Every page that uses that template is tracked automatically, so there is nothing to add page by page.
%%{init: {"flowchart": {"curve": "linear"}}}%%
graph LR
    A["Shared footer or layout<br/>(one script tag)"] --> B["Every page<br/>on your site"]
    B --> C["Website endpoint<br/>in Anosys"]
    C --> D["Dashboards"]
Step 1. Create a website endpoint
- In the console, choose the website tracking goal on the Choose Goal screen, or go to Collecting → Endpoints and create an endpoint.
- Pick the type Website / Advertising Tracker.
Result: the endpoint appears in your list with status Pending Setup.
Step 2. Copy your snippet
- Go to Collecting → Integration Options and select the endpoint.
- Open the Impression tab and choose Raw HTML (or Next.js / React if your site is built with one of those).
- Click Copy Snippet.
The HTML snippet looks like this, with your own key filled in:
No API key in the page
data-anosys-key only identifies the endpoint. It is not a secret and can't read your data, so it is safe in public HTML.
Step 3. Paste it once into your shared footer
Paste the snippet into the template that renders on every page, just before </body>.
Add it to your shared footer include (for example footer.html, a theme footer, or your CMS "footer scripts" setting).
Use the Next.js component from the Impression tab and render it once in your root layout (app/layout.js or pages/_app.js).
Use the React component from the Impression tab and render it once in your top-level App component.
Add it once, not per page
Putting the snippet in individual pages leads to pages being missed or counted twice. One copy in the shared template is all you need, including for single-page apps: route changes are detected automatically.
Result: deploy your site and open any page. Within a minute the endpoint status changes to active and its activity graph shows calls.
Step 4. See your data
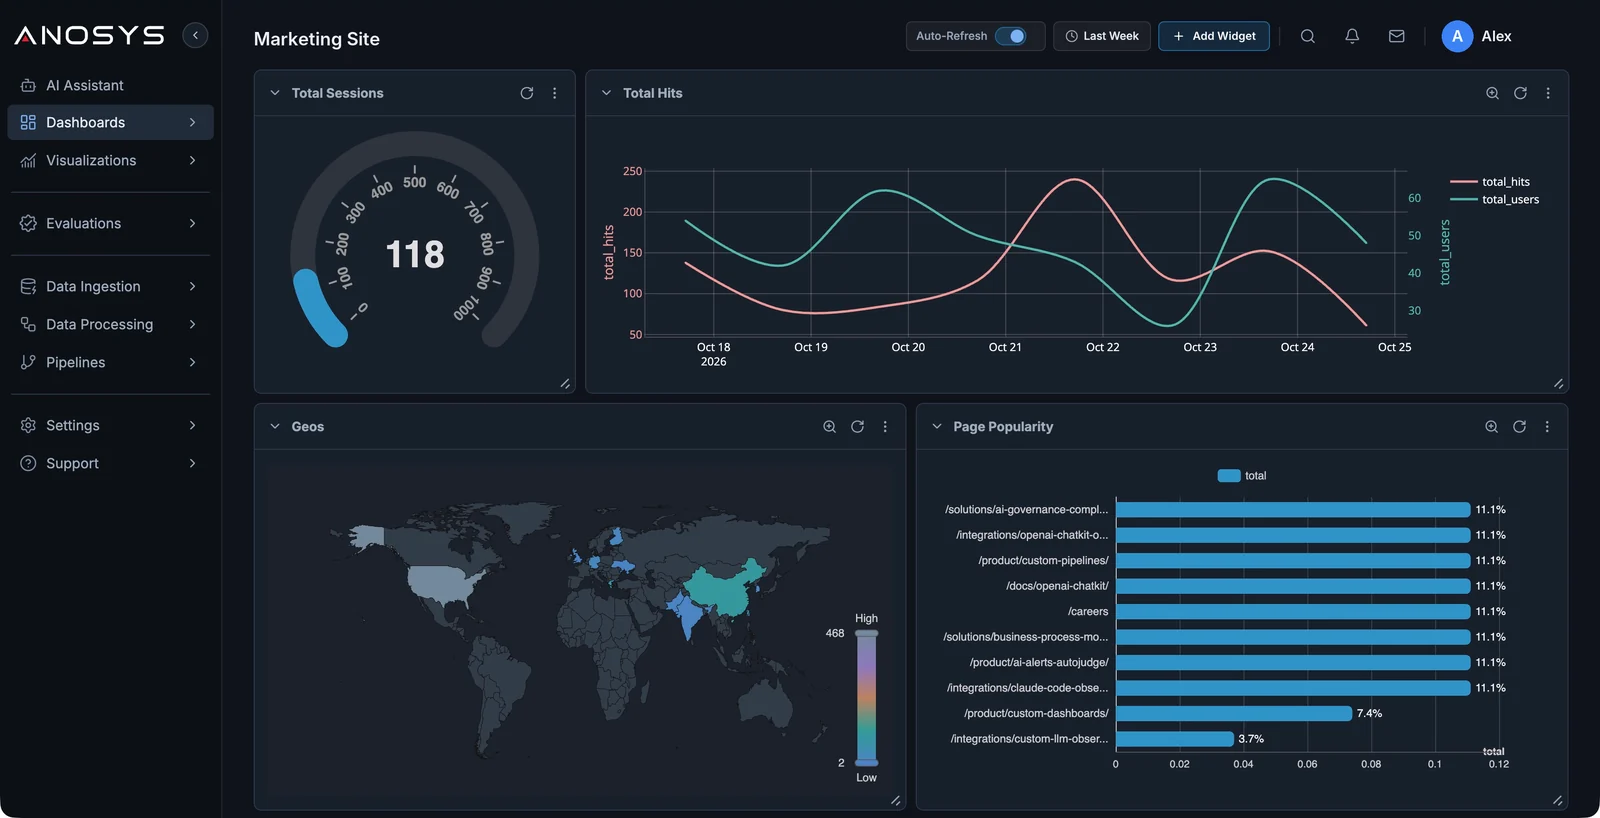
Open Dashboards → Templates and deploy a template that matches website traffic, or open Dashboards → Auto-Insights and point it at your website endpoint.
A website dashboard with sessions, hits over time, visitor locations and the most popular pages:
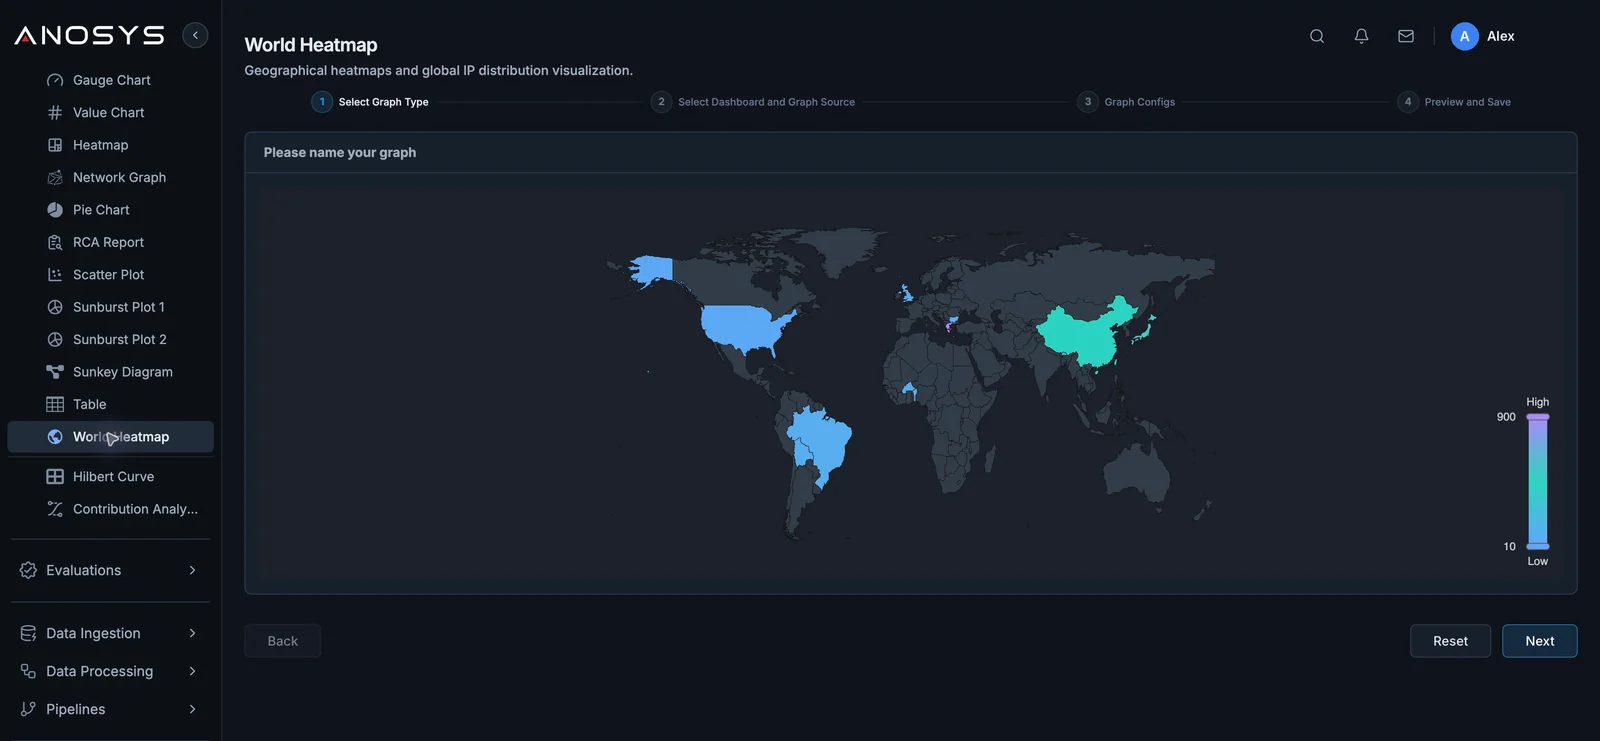
Add a World Heatmap from Visualizations to see where visitors come from:
What you get
| Area | What is measured |
|---|---|
| Traffic | Page views, unique visitors, new vs returning, sessions |
| Acquisition | Channel (direct, organic search, social, paid, email, referral), UTM campaign tags, referrer, first touch |
| Engagement | Engaged time, visible time, scroll depth |
| Clicks | Which links and buttons are clicked, internal vs outbound links, file downloads |
| Performance | Core Web Vitals (LCP, CLS, INP) and page load timing |
| Single-page apps | Virtual page views on every route change |
Input fields and form values are never captured.
Optional settings
All settings are attributes on the same script tag. The most common ones:
| Attribute | What it does |
|---|---|
data-anosys-internal-domains="example.com,example.io" |
Treats these domains (and their subdomains) as your own site, so moving between them isn't counted as a referral |
data-anosys-query-allow="ref,plan" |
Keeps these extra URL query parameters in reports (UTM tags are always kept) |
data-consent="granted" or "denied" |
Tells the tracker your visitor's consent choice directly |
To give important buttons and links a stable, readable name in click reports, add data-anosys-id to the element, and data-anosys-section to the section that contains it:
These attributes go on your shared components (header, footer, navigation, pricing cards), so they apply everywhere those components are used.
See the tracker reference for every option.
Privacy and consent
The tracker respects your visitors' choices. It reads the consent state from common consent managers (such as Cookiebot, OneTrust, Iubenda and IAB TCF banners) and honors Do Not Track and Global Privacy Control. When a visitor declines, the tracker still counts the visit but doesn't keep a lasting identifier for them. If you use a different consent tool, call window.anosys.setConsent('granted') or window.anosys.setConsent('denied') when the choice changes.
You are responsible for your own cookie notice and privacy policy.
Troubleshooting
The endpoint still says Pending Setup
- Open your site, then open the browser's developer tools → Network tab and filter for
anosys. You should see the script load and then requests being sent. - Check that the snippet is in the template that is actually used on that page.
- Ad blockers can block analytics scripts. Test in a private window with extensions disabled.
- If your template skips analytics on local or preview builds, test on your deployed site.
My single-page app only shows one page view
Make sure the script is in the root layout, not inside a route component that unmounts. Route changes made with history.replaceState are not counted by default because frameworks use it for URL clean-up; add data-anosys-count-replacestate to the script if your router navigates that way.
Next steps
- Track signed-in users inside your app: Product analytics
- Send server-side events into the same workspace: Send any data

